Overview
To authenticate your Workday account, you will need to provide the following information:
- WSDL
- ISU Username
- ISU Password
- Workday Tenant Name
Prerequisites
Please ensure you fulfill all the requirements to set up the integration:
- You have Administrator permissions in your company’s Workday instance
Instructions
Step 1: Create an Integration System User (ISU)
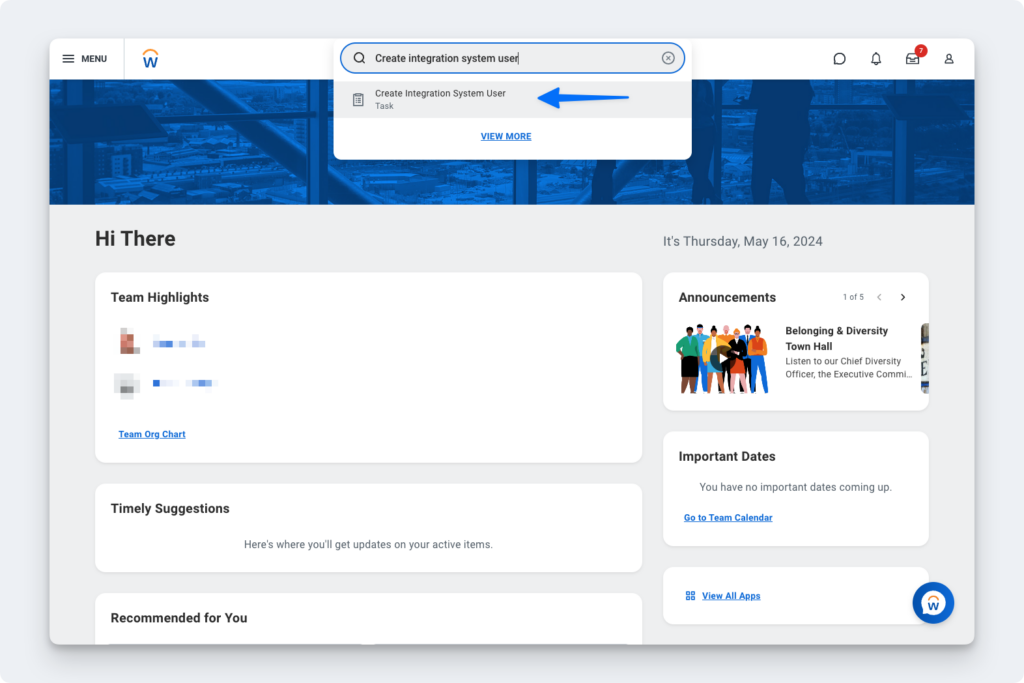
- In your Workday portal, log into the Workday tenant
- In the Search field, type Create Integration System User
- Select the Create Integration System User task
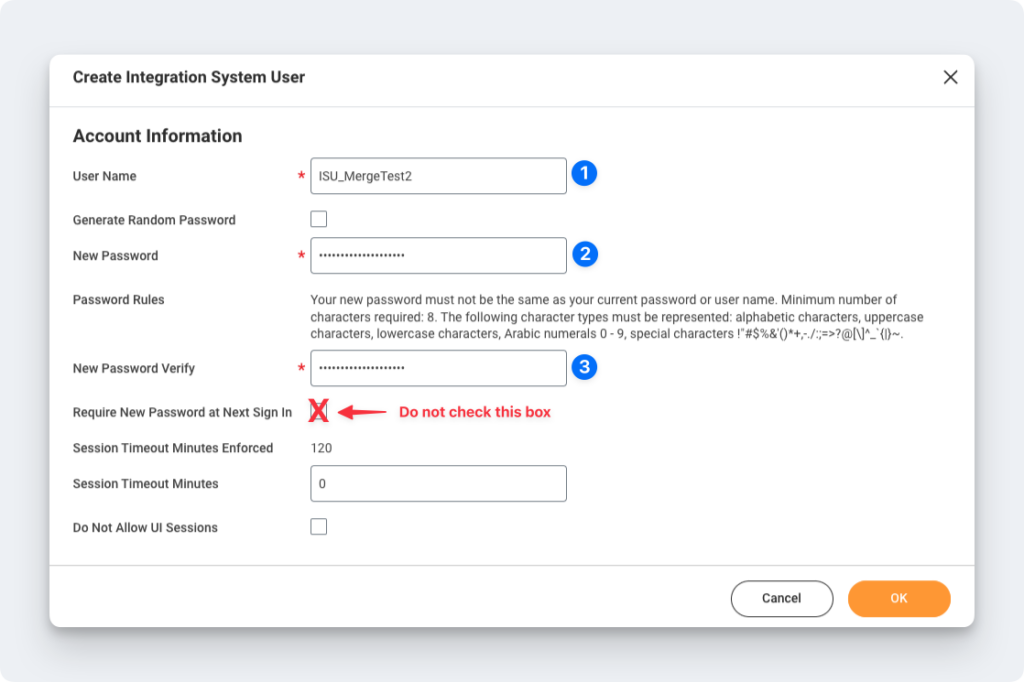
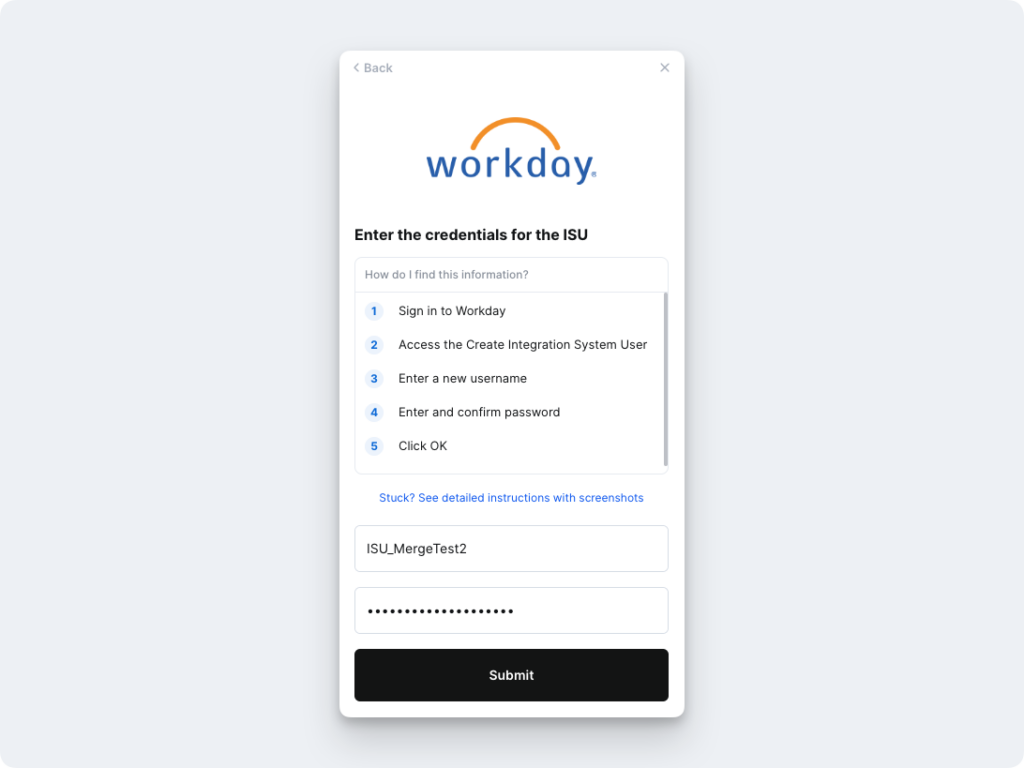
- On the Create Integration System User page, in the Account Information section, enter a user name, and enter and confirm a password
- Important: “&”, “<“, or “>” characters cannot be included in the password
- Click OK
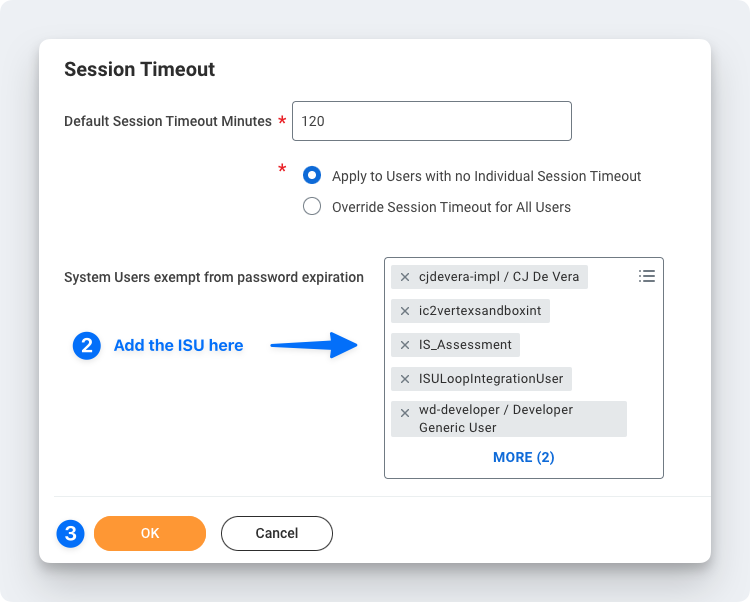
- To ensure the password doesn’t expire, you’ll want to add this new user to the list of System Users. To do this, search for the Maintain Password Rules task.
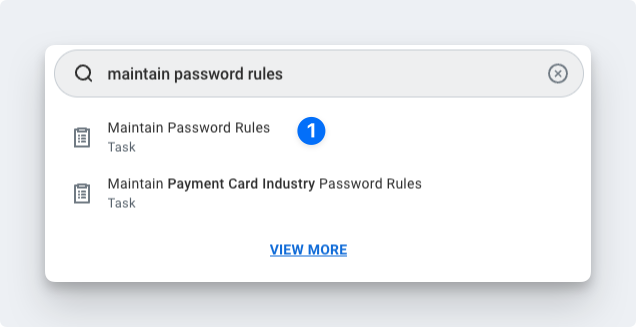
- Add the ISU to the System Users exempt from password expiration field
- Enter the Integration System User name in the linking flow
- Enter the Integration System User password in the linking flow
Step 2: Create a Security Group and assign an Integration System User
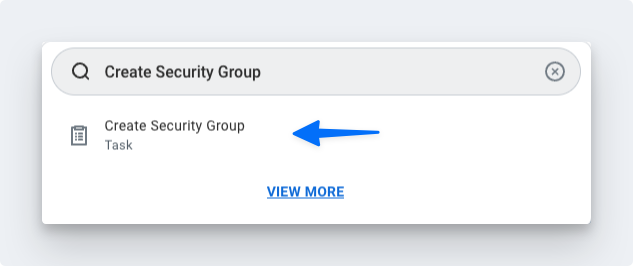
- In the Search field, type Create Security Group
- Select the Create Security Group task.
- On the Create Security Group page, select Integration System Security Group (Unconstrained) from the Type of Tenanted Security Group pull-down menu.
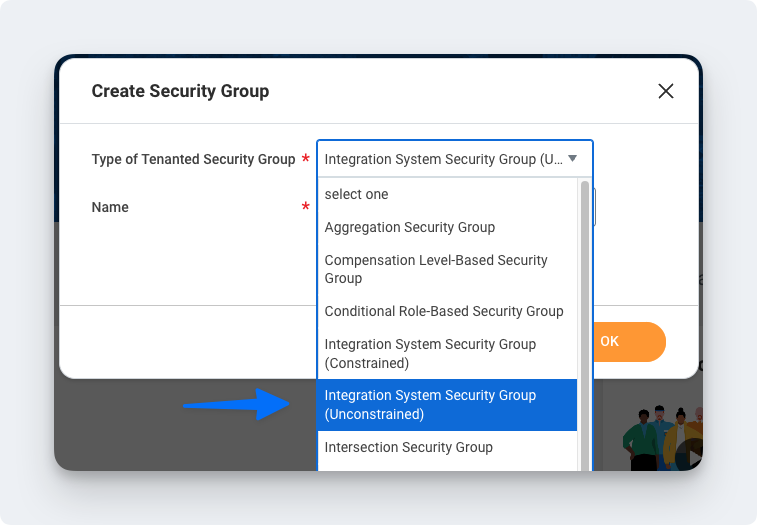
- In the Name field, enter a name
- Click OK
- On the Edit Integration System Security Group (Unconstrained) page, in the Integration System Users field, enter the same name you entered when creating the ISU in the first section
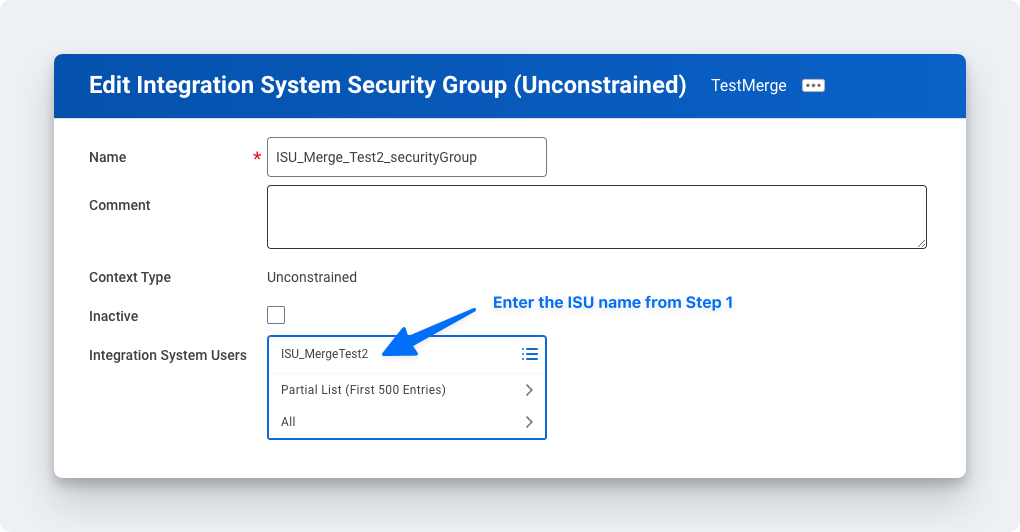
- Click OK
Step 3: Configure domain security policy permissions
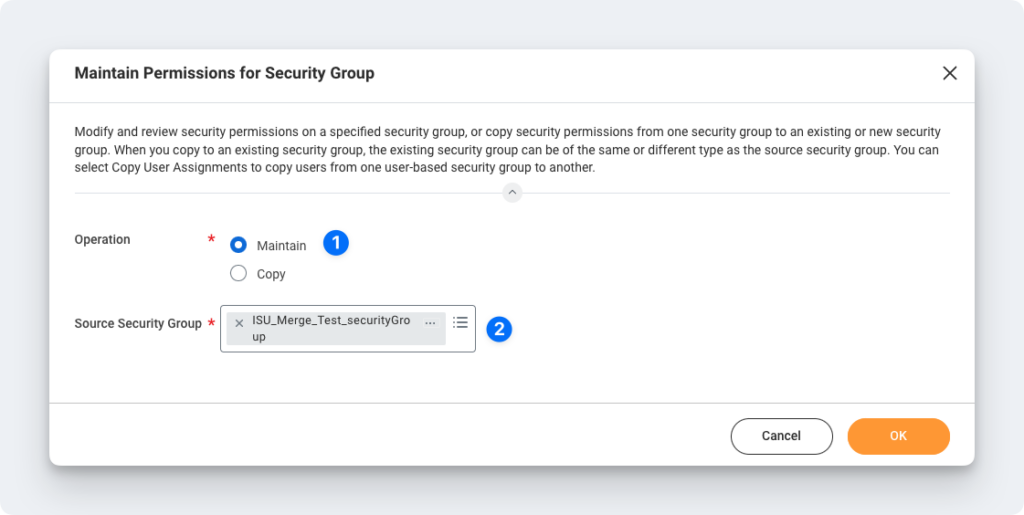
- In the Search field, type Maintain Permissions for Security Group

- Make sure the Operation is Maintain, and the Source Security Group is the same as the security group that was assigned in Step 2
- On the next screen, add the corresponding Domain Security Policies:
| Operation | Domain Security Policy |
| Get Only | Worker Data: Public Worker Reports This is the minimum required permission |
| Get Only | Person Data: Name |
| Get Only | Person Data: Personal Data |
| Get Only | Person Data: Home Contact Information |
| Get Only | Person Data: Work Contact Information |
| Get Only | Worker Data: Compensation |
| Get Only | Worker Data: Workers |
| Get Only | Worker Data: All Positions |
| Get Only | Worker Data: Current Staffing Information This is required to surface Employment Status of Employees |
| Get Only | Worker Data: Employment Data |
| Get Only | Worker Data: All Worker’s Positions Past and Present This is required to pull Historical Employments |
| Get Only | Worker Data: Organization Information |
| Get Only | Reports: Pay Calculation Results for Worker (Results) |
| Get Only | Worker Data: Payroll |
| Get Only | Worker Data: Time Off |
Step 4: Activate security policy changes
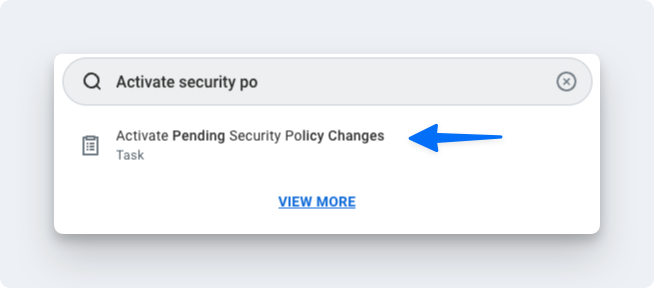
- In the search bar, type “Activate Pending Security Policy Changes” to view a summary of the changes in the security policy that needs to be approved
- Add any relevant comments on the window that pops up
- Confirm the changes in order to accept the changes that are being made and hit OK

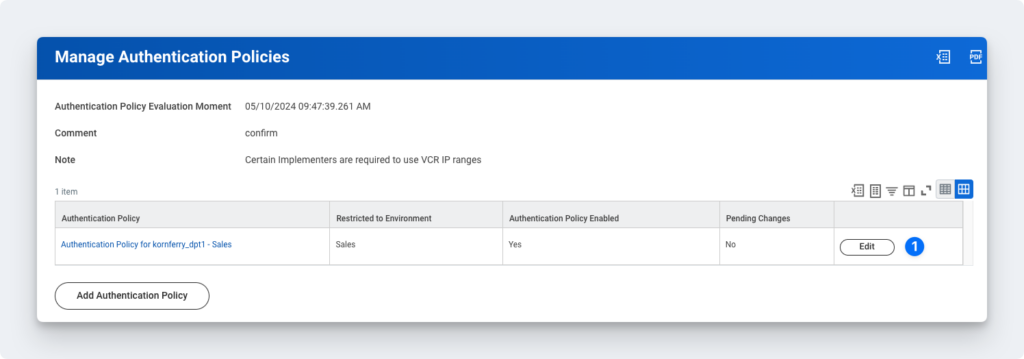
Step 5: Validate the authentication policy is sufficient
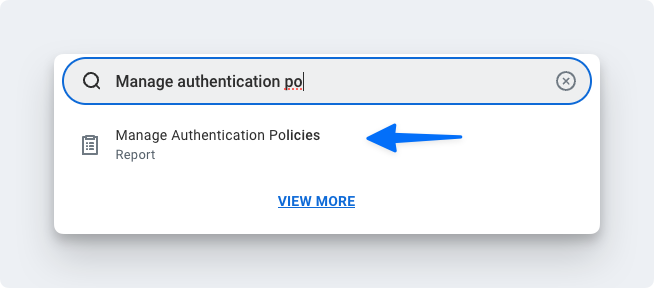
- Search for Manage Authentication Policies
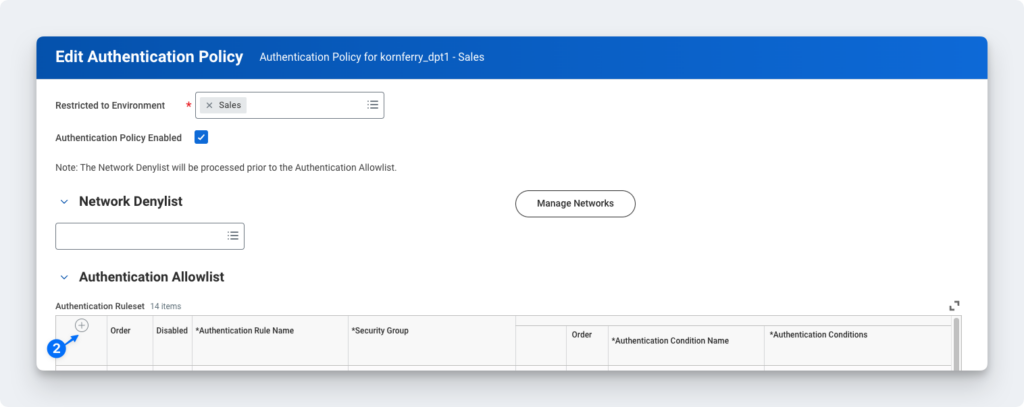
- Click Edit on the authentication policy row
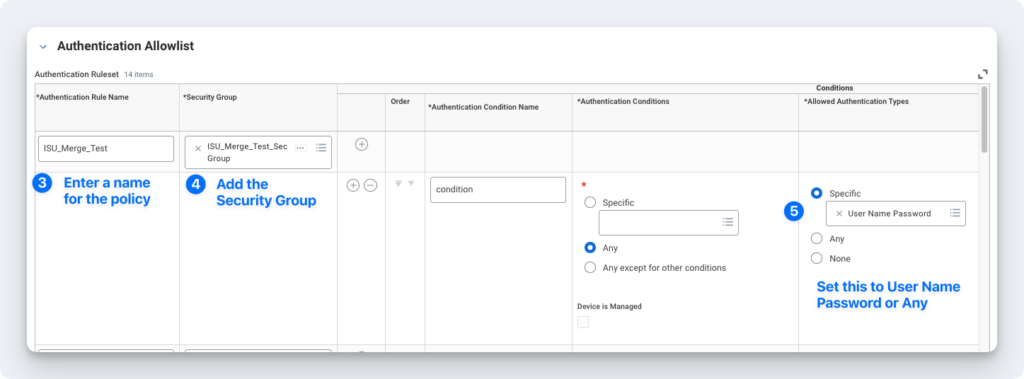
- Create an Authentication Rule
- Enter a name, add the Security Group, and ensure Allowed Authentication Types is set to Specific User Name Password or Any
- Note: You don’t have to create a new Authentication Rule if you already have an existing one set to User Name Password or Any. You can add the ISU you created to that rule instead.
You will need to create a new rule if SAML is the only Authentication Rule you see for “Allowed Authentication Types.”
Step 6: Activate all pending authentication policy changes
- In the search bar type, activate all pending authentication policy changes
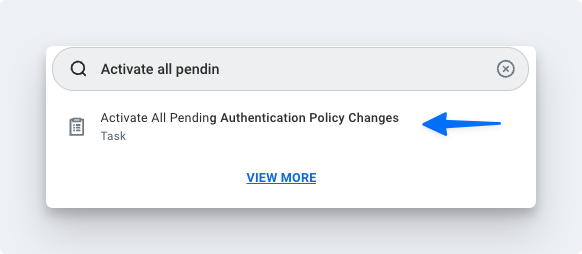
- Proceed to the next screen and confirm the changes. This will save the Authentication Policy that was just created or edited
Step 7: Obtain the web services endpoint
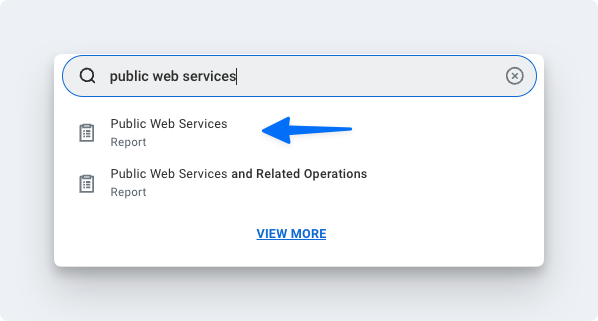
- Search in Workday for Public Web Services
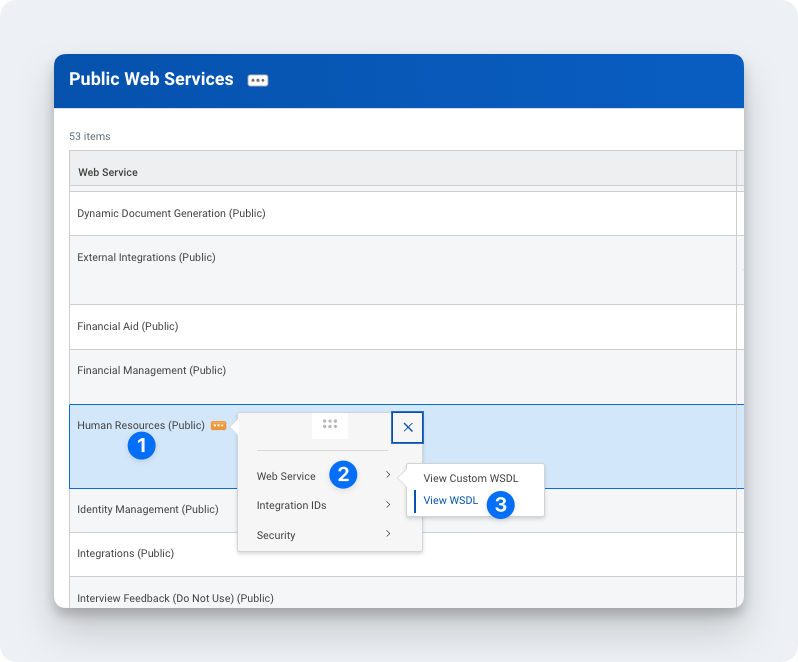
- Find Human Resources (Public) if you are connecting Workday HRIS
- Click the three dots to access the menu. Click Web Services > View WSDL
- Navigate to the bottom of the page that opens (it may take a few seconds to load)
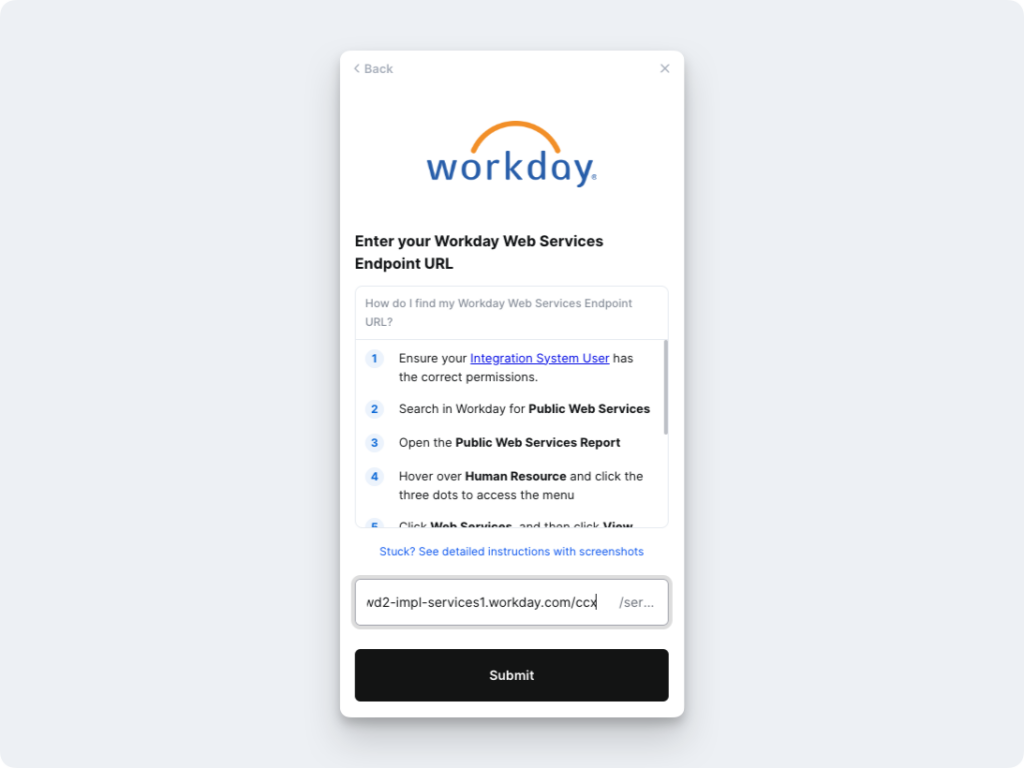
- Copy everything until you see /service. This should look something like
https://wd2-impl-services1.workday.com/ccx

- Enter the Web Services Endpoint into the linking flow
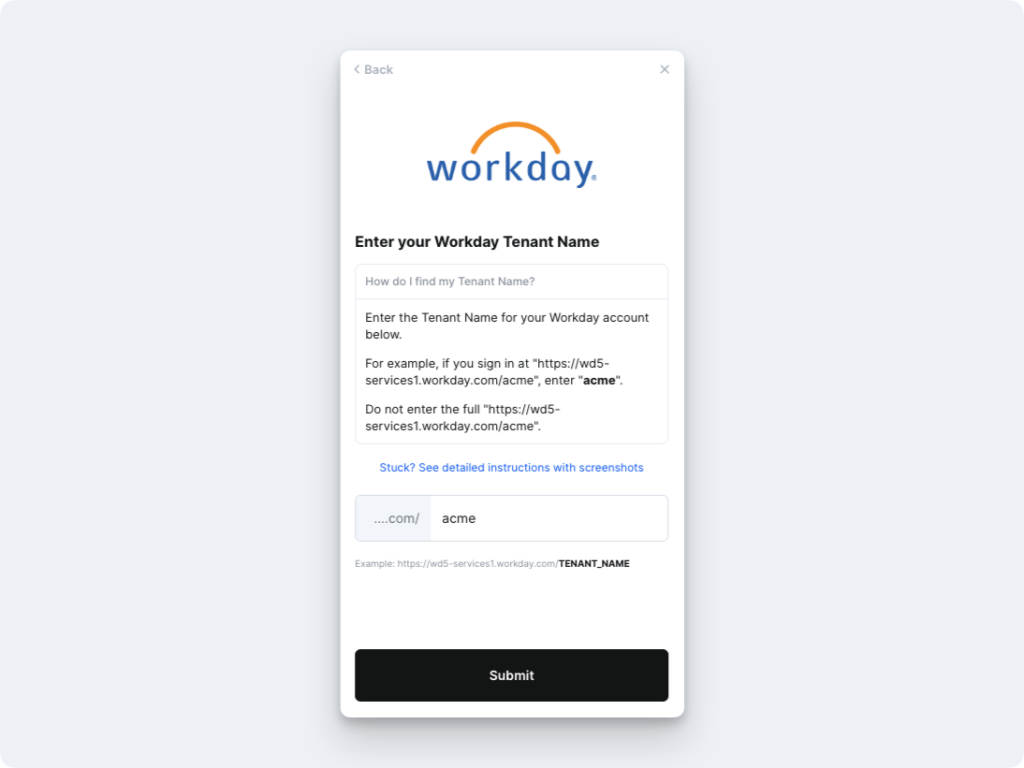
Step 8: Enter your Tenant Name in the linking flow
- Enter your Workday tenant name into the linking flow.
- Example: If you sign in at “https://wd5-services1.workday.com/acme”, enter “acme“